部署一个获取 HTTP Header 程序到 K8S
通过实战能更好的理解 K8S、istio,这里将开发一个 golang 程序,将其部署到 K8S中,并通过 istio 做流量调度。
操作路径:使用 Golang 开发 -> 编译为 Golang -> 构建 Docker 镜像 -> 创建 Deployment 和 Service -> 创建 Gateway -> 创建 Virtual Service
本次实战会使用服务网格作为流量管理。(如果你没有开通服务网格,可以替换为 Ingress)
前置条件
- 腾讯云容器服务open in new window
- 镜像仓库open in new window
- 腾讯云容器服务服务网格open in new window
- 包含 Docker 环境的电脑,小编的是一台Mac,安装了 Mac 版 Dockeropen in new window
- 本地 golang 环境open in new window
先看一下效果
访问 header.dhcp.cnopen in new window 查看当前 HTTP Header
GET 请求示例
$ curl dhcp.cn/header/shop
UserAgent: curl/7.64.1
Protocol: HTTP/1.1
Method: GET
Host: dhcp.cn
RemoteAddr: 192.168.31.125:56672
RequestURI: /header/shop
Header: map[Accept:[*/*] User-Agent:[curl/7.64.1]]
Body:
X-Forwarded-For:
Accept: */*
2
3
4
5
6
7
8
9
10
11
POST 请求示例
$ curl -XPOST -H 'X-Forwarded-For: 192.168.1.1' -H "content-Type: application/JSON"  dhcp.cn/header/mall -d '{"age": 22}'
UserAgent: curl/7.64.1
Protocol: HTTP/1.1
Method: POST
Host: dhcp.cn
RemoteAddr: 192.168.31.125:56028
RemoteAddr: 127.0.0.1:50748
Header: map[Accept:[*/*] Content-Length:[11] Content-Type:[application/JSON] User-Agent:[curl/7.64.1] X-Forwarded-For:[192.168.1.1]]
Body: {"age": 22}
X-Forwarded-For: 192.168.1.1
Accept: */*
2
3
4
5
6
7
8
9
10
11
话不多说,实战干起来。
1. 使用 Golang 编写一个获取 HTTP Header 的服务。
1.1 代码
以下是一个完整的基于 Golang 实现的 HTTP Server,打印 HTTP Header。
package main

import (
	"fmt"
	"io/ioutil"
	"log"
	"net/http"
)

func main() {

	http.HandleFunc("/", func(w http.ResponseWriter, r *http.Request) {

		body, _ := ioutil.ReadAll(r.Body) // 获取 Body,因为 r.Body 的类型是 io.ReadCloser,而不是 string

		fmt.Fprintf(w, "UserAgent: %s\n", r.UserAgent())                         // 示例:curl/7.64.1,r.UserAgent() 是字符串,直接打印即可
		fmt.Fprintf(w, "Protocol: %s\n", r.Proto)                                // 示例:HTTP/1.1
		fmt.Fprintf(w, "Method: %s\n", r.Method)                                 // 示例:GET
		fmt.Fprintf(w, "Host: %s\n", r.Host)                                     // 示例:192.168.31.125,请求主机
		fmt.Fprintf(w, "RemoteAddr: %s\n", r.RemoteAddr)                         // 示例:192.168.31.125:54642,客户端地址(如果用了负载均衡器,请通过 X-Forwarded-For 来获取客户端真实IP)
		fmt.Fprintf(w, "RequestURI: %s\n", r.RequestURI)                         // 示例:/mall,请求URI
		fmt.Fprintf(w, "Header: %s\n", r.Header)                                 // 示例:map[Accept:[*/*] Content-Length:[11] Content-Type:[application/JSON] User-Agent:[curl/7.64.1] X-Forwarded-For:[192.168.1.1]]
		fmt.Fprintf(w, "Body: %s\n", body)                                       // 示例:{"age": 22},例如POST 请求的 Body
		fmt.Fprintf(w, "X-Forwarded-For: %s\n", r.Header.Get("X-Forwarded-For")) // 示例:192.168.1.1,自定义Header,一般有负载均衡器的场景会把客户端的真实IP存储在这里
		fmt.Fprintf(w, "Accept: %s\n", r.Header.Get("Accept"))                   // 示例:*/*

	})

	log.Println("Starting server ...")
	log.Fatal(http.ListenAndServe(":80", nil))
}
2
3
4
5
6
7
8
9
10
11
12
13
14
15
16
17
18
19
20
21
22
23
24
25
26
27
28
29
30
31
1.2 编译测试
$ go build  print-header.go
$ ./print-header
2021/03/20 08:52:55 Starting server ...
$ curl localhost
UserAgent: curl/7.64.1
Protocol: HTTP/1.1
Method: GET
Host: localhost:80
RemoteAddr: [::1]:64838
RequestURI: /
Header: map[Accept:[*/*] User-Agent:[curl/7.64.1]]
Body:
X-Forwarded-For:
Accept: */*
2
3
4
5
6
7
8
9
10
11
12
13
14
1.3 编译在 Linux 下运行的程序
由于程序将运行在 Linux 镜像内,在Mac下编译时需要指定运行环境的架构和操作系统。
$ CGO_ENABLED=0 GOOS=linux GOARCH=amd64 go build print-header.go
2. 构建 Docker 镜像
2.1 编写 dockerfile
FROM alpine:3.13.2  ## 很小的一个镜像,只有几MB。
WORKDIR /print-header/ ## 镜像中程序的工作路径
ADD print-header . ## 将当前目录的 print-header 程序添加到上面的工作路径中
EXPOSE 80  ## 对外暴露 80 端口
CMD ["/print-header/print-header", "-g", "daemon off;"]  ## 镜像启动时加载程序运行
2
3
4
5
2.2 构建镜像
$ docker build -t print-header:0.01 .
$ docker images
REPOSITORY                                          TAG                                                     IMAGE ID       CREATED         SIZE
print-header                                        0.01                                                    7e67ffe991dd   3 weeks ago     15.8MB
2
3
2.3 推送镜像
这里是使用腾讯云的镜像仓库open in new window
$ docker tag print-header:0.01 ccr.ccs.tencentyun.com/<YOUR_DOCKER_NAESPACE>/print-header:0.01
$ docker push ccr.ccs.tencentyun.com/<YOUR_DOCKER_NAESPACE>/print-header:0.01
2
3. 创建 Deployment 和 Service
注意几个重点参数即可,选择镜像地址
- Deployment
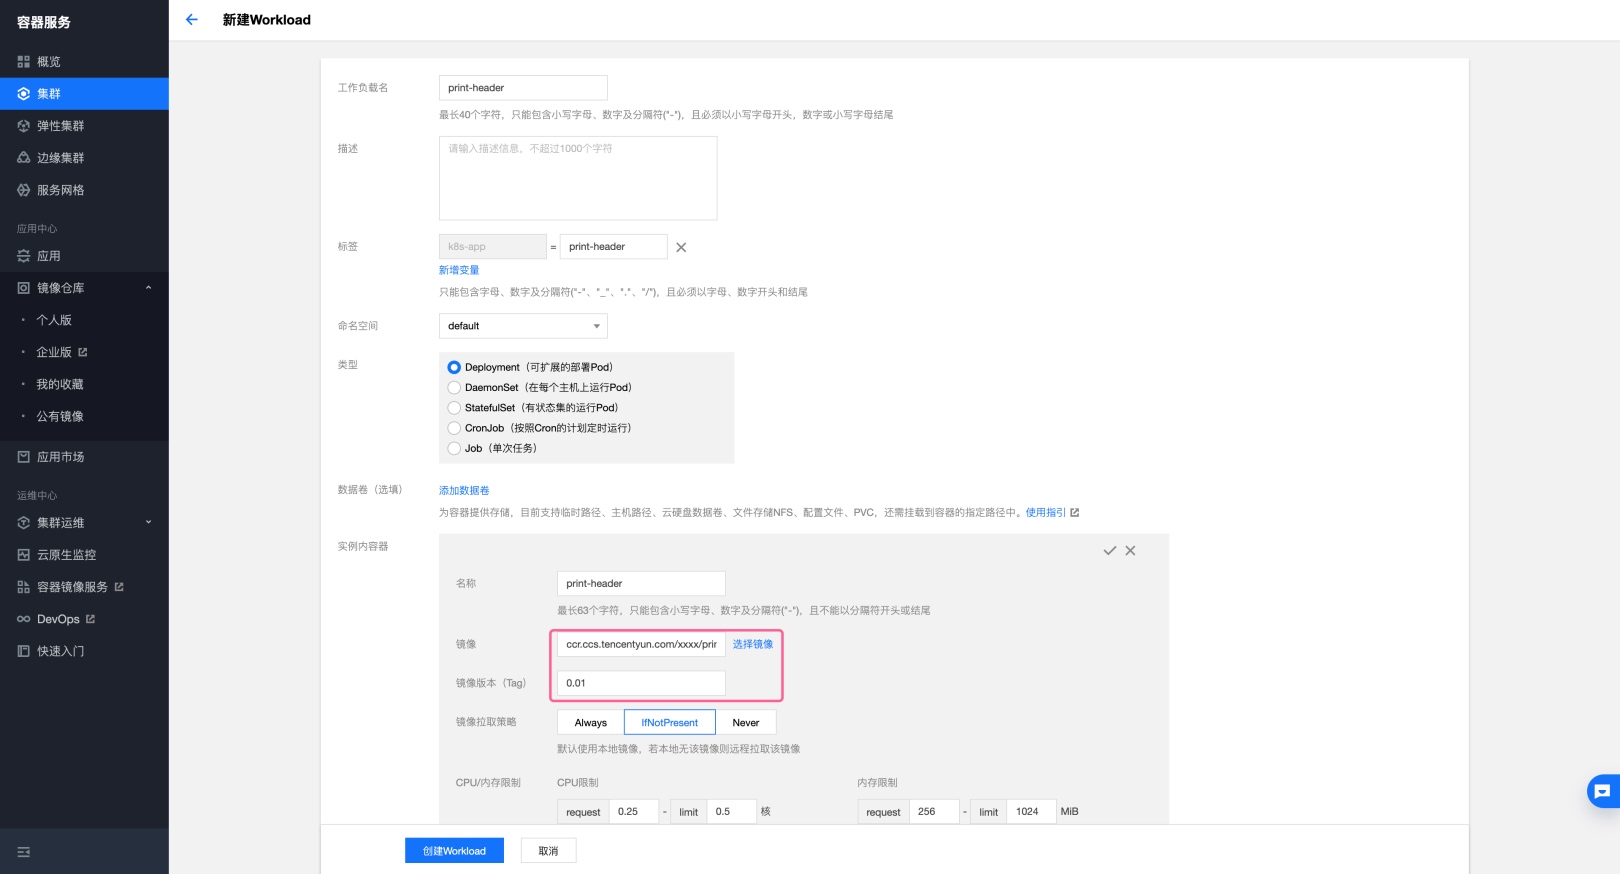
- Service
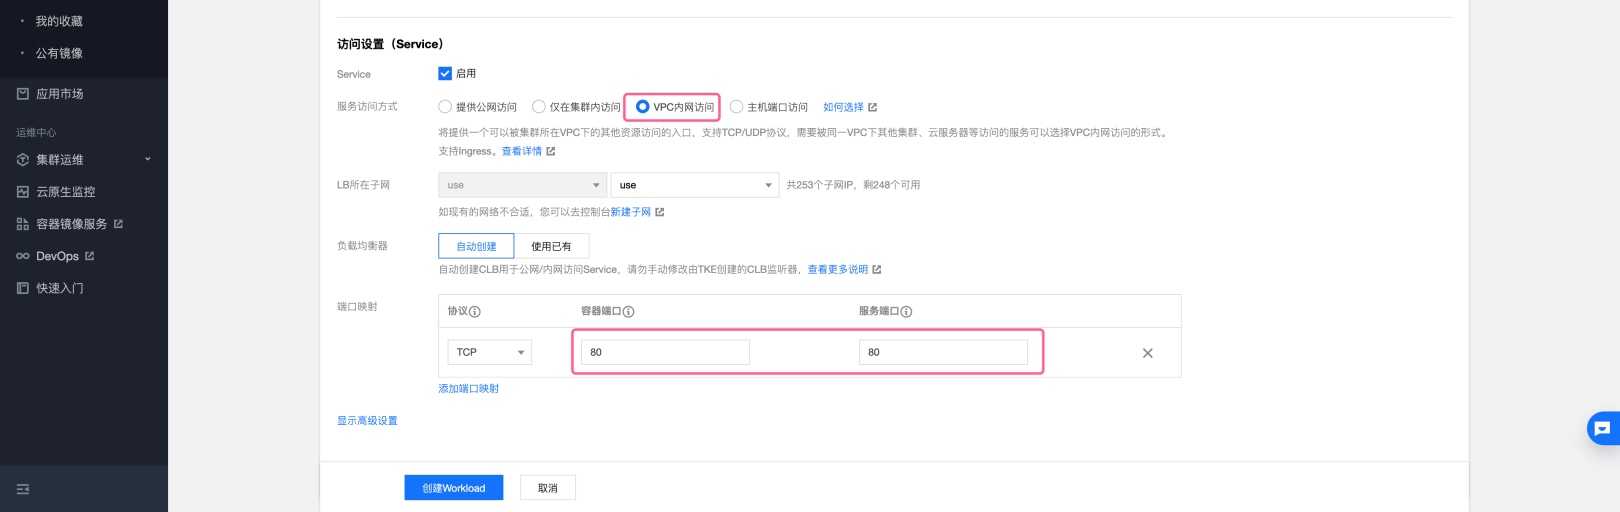
服务访问方式:VPC内网访问,因为 HTTP 服务一般不直接以 Service 直接对外提供访问入口,而是通过 Ingress 或 Istio(服务网格)。
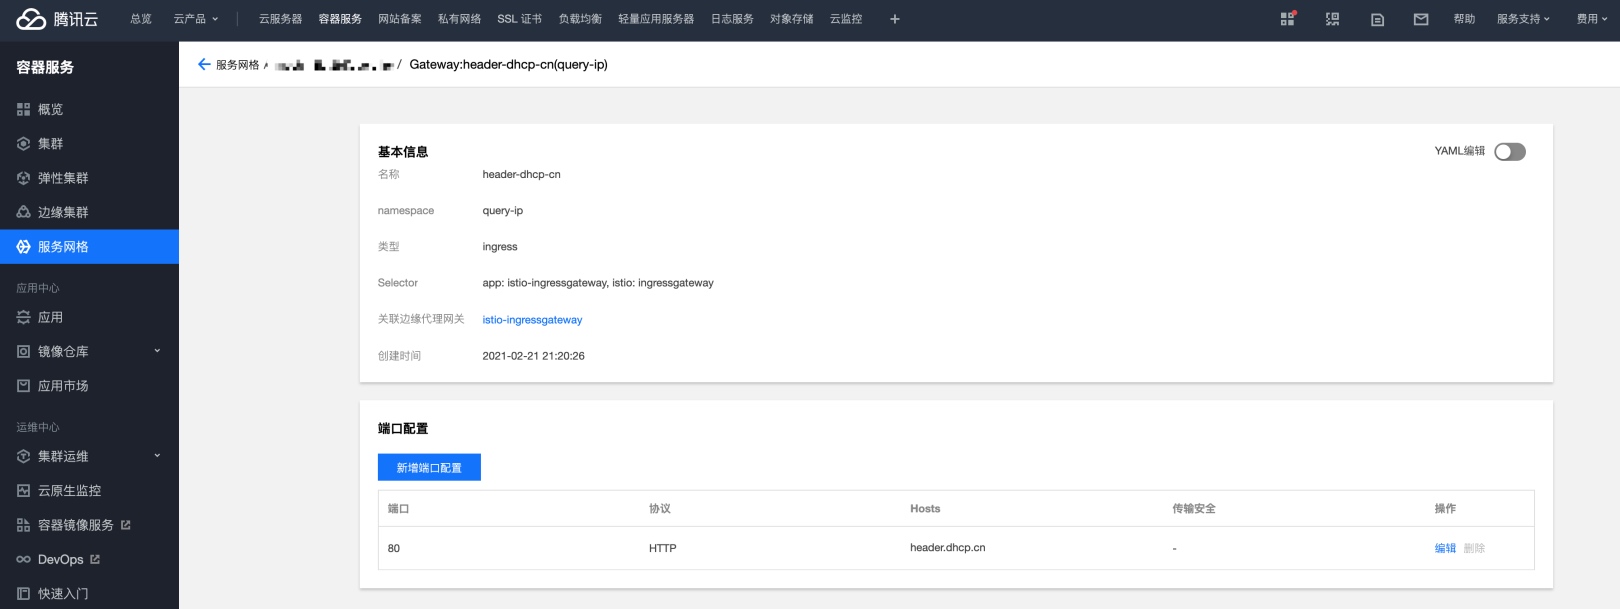
4. 创建 Gateway
如果没有开通服务网格功能,可以把接下来的两个步骤替换为 Ingress。
将域名解析到 istio-ingressgateway 所绑定的 负载均衡器 IP。
创建流量入口,放行指定HTTP 请求为指定 HOSTs、指定端口 (即 80)的流量。
5. 创建 Virtual Service
创建流量规则,这里先使用默认的。
如果想将 curl 等后台程序 和 浏览器的流量分开,可以参考这篇文章 istio virtualservice:使用正则过滤流量open in new window。
注意 关联Hosts 、挂载Gateway 设置一定要正确。

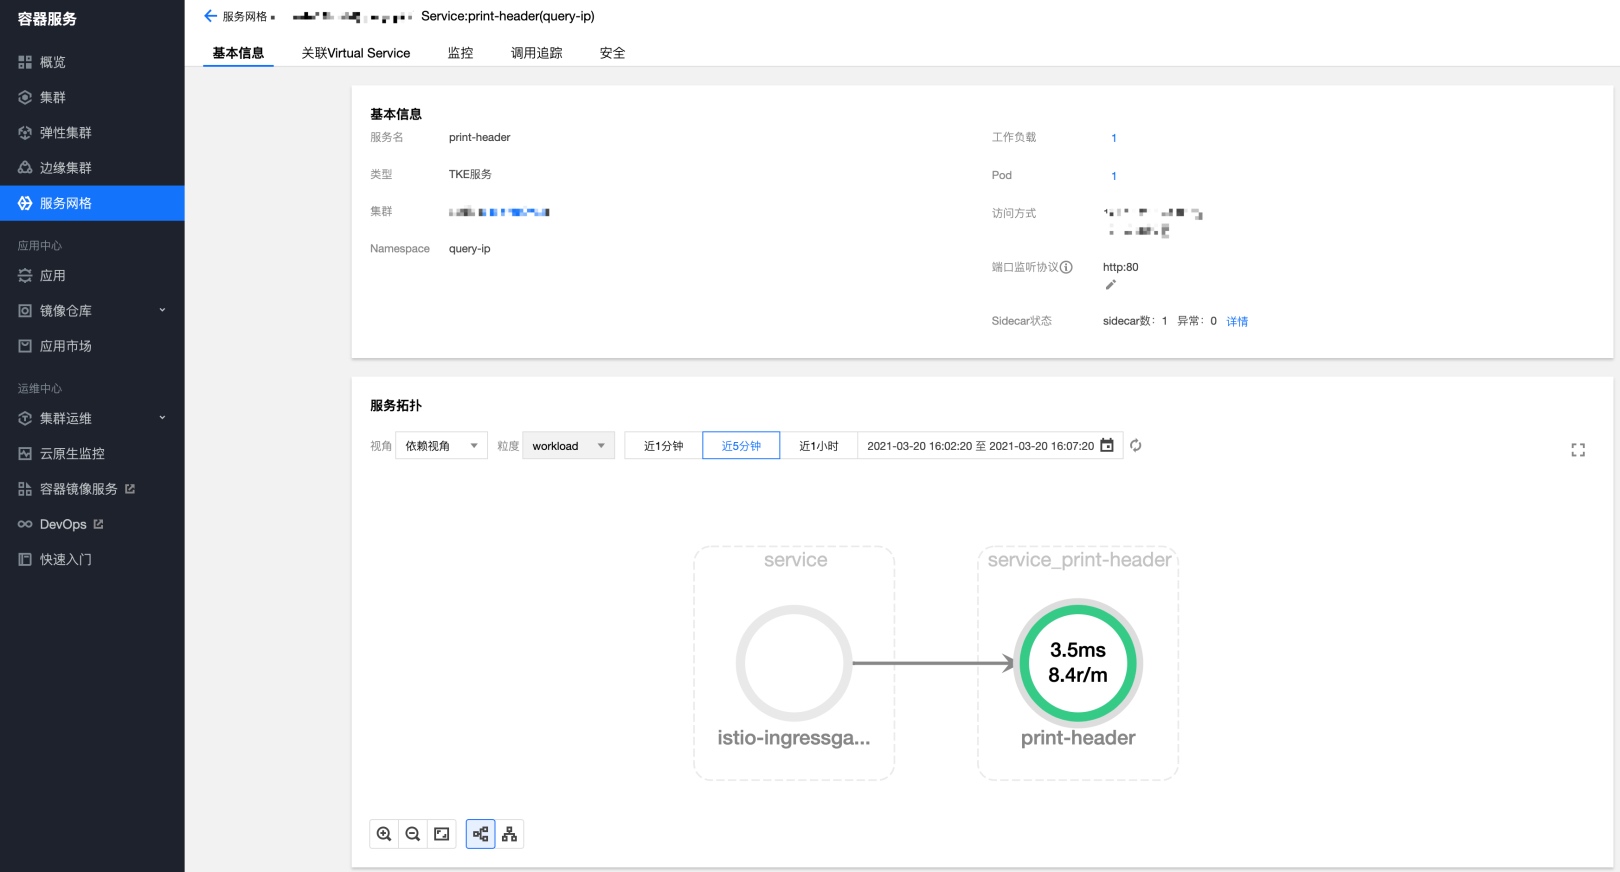
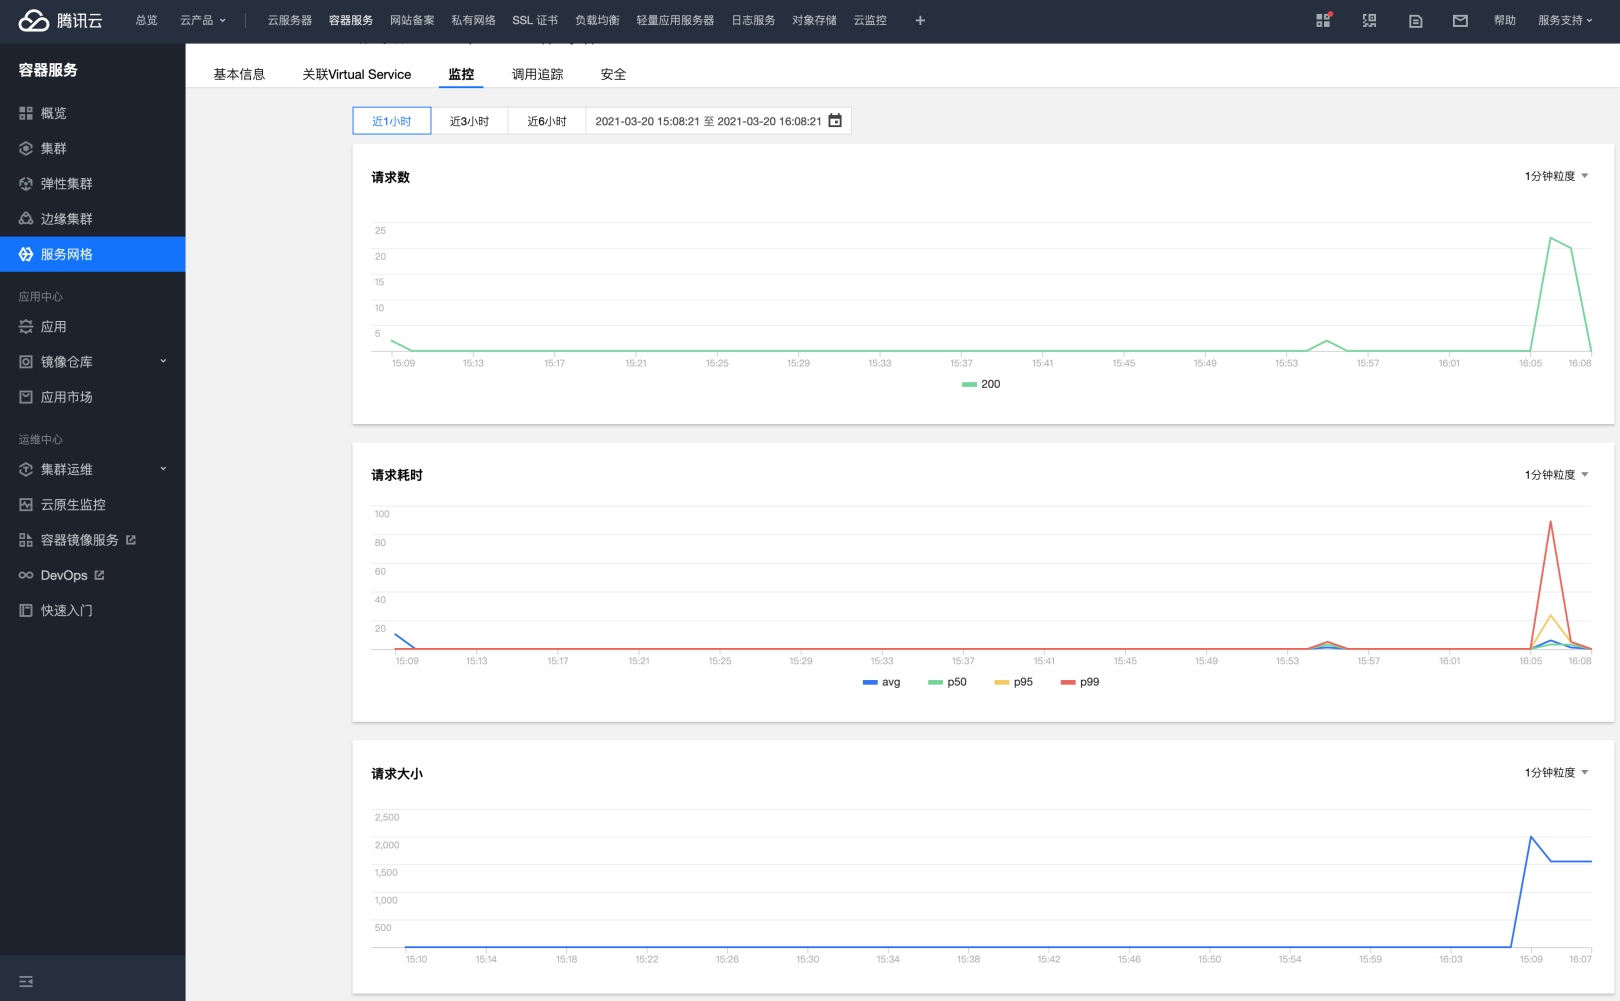
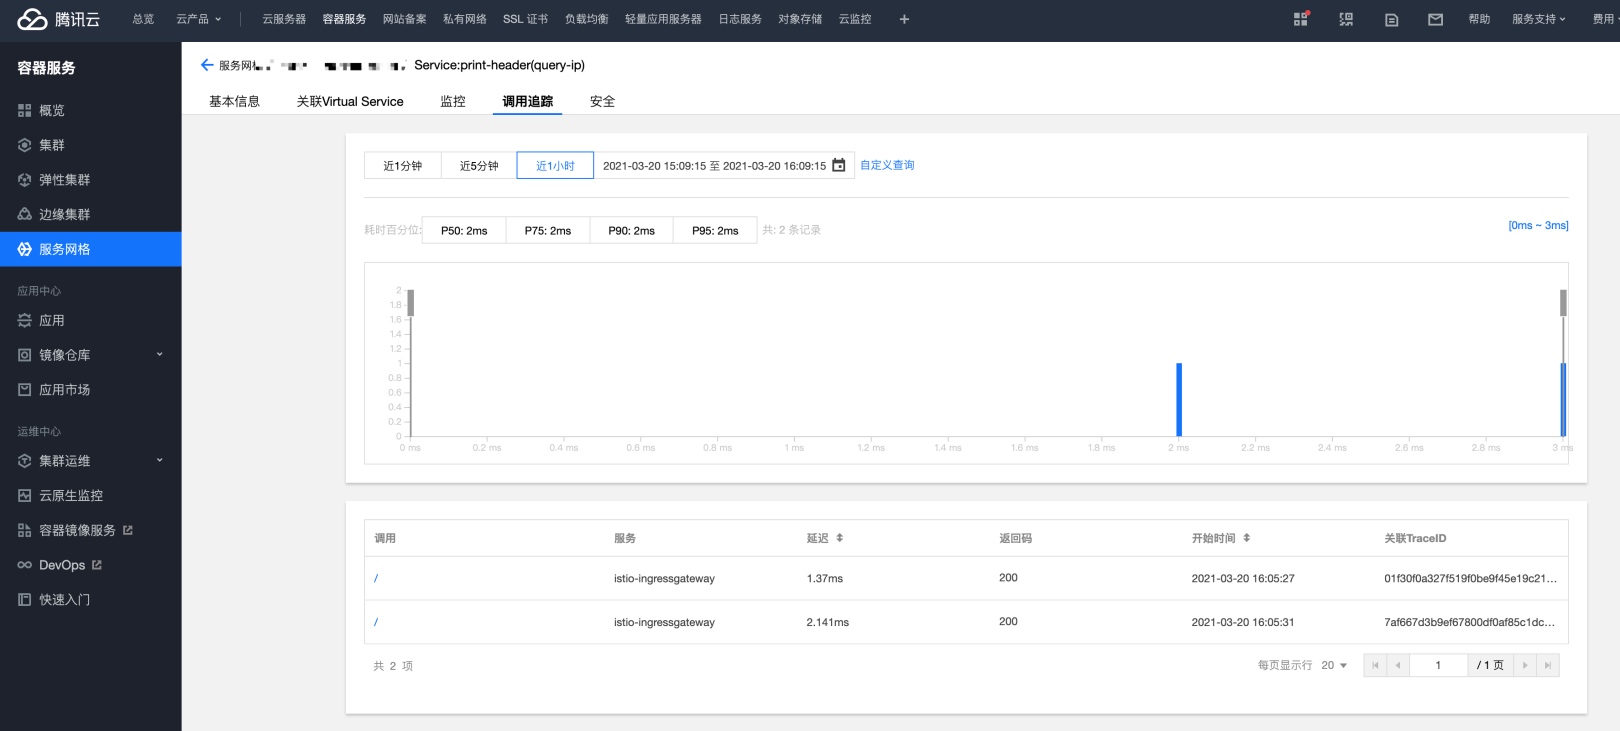
6. 使用效果
在电脑上请求服务,可以看到服务网格的数据。